That said, "drone photography" covers a wide range of outcomes. The same piece of airspace, shot by two different operators, can produce footage that lands a real estate listing or footage that ends up on a hard drive collecting dust. The difference comes down to pre-flight planning, camera configuration, flight technique, and what happens in post-production — plus whether the operator is legally allowed to be flying commercially in the first place.
This guide covers all of it: how to shoot aerial photography step by step, the variables that most affect output quality, FAA regulations for commercial operations, and the common mistakes that produce footage clients can't use.
Key Takeaways
- Configure camera settings (RAW format, manual white balance, locked exposure) on the ground — not mid-flight
- Always scout locations and verify airspace before launch using FAA-approved tools like B4UFLY or LAANC
- U.S. commercial drone work requires an FAA Part 107 Remote Pilot Certificate — stay below 400 ft AGL and within visual line of sight
- Aerial photography delivers the highest ROI for real estate, industrial sites, construction, and marketing campaigns — not every project benefits from it
- The most avoidable failures: wrong camera settings for the conditions, skipped airspace checks, and underestimating wind at altitude
How to Shoot Aerial Photography with Drones
Results depend on executing each phase in sequence. Rushing pre-flight preparation — the stage most operators shortchange — directly compromises both image quality and safety.
Plan Your Shot Before You Fly
Start with a mapping tool. Google Earth or dedicated airspace apps let you identify obstacles, confirm the site has a safe takeoff and landing area, and visualize potential camera angles before you leave the ground. Pre-visualizing the finished product before launch saves battery time and increases the likelihood each flight produces usable shots.
Timing matters more than most people expect. Golden hour (shortly after sunrise or before sunset) produces softer, warmer light with longer shadows that add dimension to architecture, landscapes, and industrial facilities. Flat midday sun flattens texture and creates harsh shadows that expose imperfections.
For real estate and exterior industrial sites, golden hour light alone can elevate perceived production value.
Weather deserves the same attention as airspace. DJI rates the Air 3, Mavic 3 Pro, and Mavic 3 Classic at a maximum wind resistance of 12 m/s, and their flight-time specs are measured under windless, controlled conditions. Real-world wind at altitude is often stronger than what you feel on the ground.
Overcast light can actually work in your favor for architectural subjects by eliminating harsh shadow lines. Either way, check forecasts before committing to a shoot time.
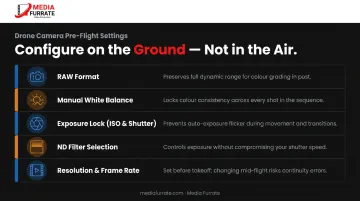
Configure Your Camera Settings on the Ground
Don't leave this for the air. Once the drone is 200 feet up, adjusting settings costs battery time and introduces inconsistency.
Key configurations before launch:
- Shoot RAW (or RAW + JPEG): RAW preserves 12-bit or 14-bit per channel data, giving you far more range for exposure and color correction in post. JPEG compresses and discards sensor information permanently
- Lock white balance manually: Auto white balance continuously adjusts as the drone pans, creating color temperature shifts mid-clip that are difficult to correct later
- Lock exposure settings: Low ISO (typically 100 in bright conditions), shutter speed roughly double the frame rate. The 180-degree shutter rule, as documented by RED, means approximately 1/50 at 25fps or 1/60 at 30fps
- Use ND filters in bright conditions. DJI describes them as "sunglasses" for the camera: they reduce incoming light so you can maintain proper shutter speed without overexposing. An ND16 or ND32 is common for midday sun
- Confirm resolution and frame rate before takeoff. 4K/30fps works for most commercial projects; verify with the client before you fly
Execute Cinematic Flight Maneuvers
Most commercial aerial work comes down to three core moves:
- Pull-away reveal : Hover at subject eye level, then pull back and ascend simultaneously. This builds spatial context for the viewer and works as an establishing shot for properties, construction sites, and outdoor events
- Orbit/Point of Interest (POI) : The drone circles a fixed subject while keeping the camera trained on it. DJI Enterprise describes POI as an intelligent flight mode that collects 360-degree data around a fixed point. Ideal for buildings, industrial structures, and landmarks
- Nadir (straight-down) shot : Camera angled directly at the ground beneath the drone. Powerful for revealing site layouts, property footprints, and patterns that are invisible from any angled side perspective
For tight spaces, confined sites, or flying near obstacles, use Cine/Tripod mode. DJI's Cine mode limits flight speed, ascent/descent rate, and rotation to produce smoother, more controlled footage , which reduces collision risk significantly compared to flying at full speed.
Edit and Deliver Final Assets
Start post-production with corrections, then move to color grading.
- Lens corrections first: Wide-angle drone lenses introduce barrel distortion that makes straight lines appear curved. Adobe Camera Raw provides corrections for barrel distortion and chromatic aberration; apply these before any color work
- White balance fine-tuning: Even with manual white balance locked, slight adjustments in Lightroom or Camera Raw give you consistency across a shoot
- HDR scenarios: For high-contrast scenes (sunrise, white buildings against bright sky), use Auto Exposure Bracketing to capture multiple frames at different exposures, then merge in post to recover shadow and highlight detail a single frame misses
- Export formats: JPEG for still photography, MP4/H.264 for video. Adobe recommends H.264 (.mp4) for most online applications. Confirm resolution and color profile match the intended platform before delivery
Key Variables That Determine Aerial Photography Quality
Two operators with identical equipment over the same location can produce dramatically different results. These variables explain why.
Lighting and Time of Day
Light direction changes everything. Shooting with the sun behind the drone illuminates the subject evenly; shooting into it creates silhouettes and lens flare unless managed intentionally. The practical guidance: schedule exterior shoots for golden hour when possible, and build weather contingency into the shoot day.
Flat midday light is the enemy of architectural and industrial subjects. It removes the shadow definition that gives structures depth and dimension. Golden hour light adds the warm tones and long shadows that make properties and facilities look larger and more visually interesting in marketing materials.
Camera Settings and Sensor Exposure
High ISO values introduce digital noise that degrades footage quality — this is especially visible in shadow areas on high-contrast commercial scenes. ND filters are the right tool for controlling shutter speed in bright conditions without pushing ISO up or stopping down the aperture.
Correct exposure at capture is non-negotiable. Blown highlights and severely underexposed shadows cannot be fully recovered in post, even from RAW files. For Louisiana and Gulf South shoots, the most common exposure traps are:
- White buildings clipping against bright summer skies
- Water reflections blowing out midday highlights
- Open industrial facilities with extreme light-to-shadow contrast
Flight Altitude and Camera Angle
Altitude determines how much of the story you're telling:
- Too low — Subject fills the frame but loses spatial context; the viewer can't understand the site's scale or surroundings
- Too high — Subject becomes a small element in a wide landscape; detail is lost
- Real estate sweet spot — Position where the top of the structure sits just below the skyline without merging with background objects
- Industrial and construction — Top-down (nadir) angles work better for showing layout, scale, and site progress
Weather and Environmental Conditions
Wind above DJI's 12 m/s threshold causes micro-vibrations the gimbal cannot fully stabilize, producing footage with visible jitter. Wind at altitude is also frequently stronger than what's measured at ground level: a 10 mph breeze at takeoff can be 20 mph at 300 feet.
Humidity and haze (both common in Louisiana's climate) reduce contrast and color saturation, particularly over bodies of water and open industrial facilities. Adobe's Dehaze tool addresses this in post, but it can't fully compensate for severe atmospheric haze captured at the sensor level.
Cold temperatures fall within DJI's listed operating range of -10°C to 40°C, but battery performance degrades at the lower end. For winter shoots, plan for shorter effective flight times than the advertised maximums.
FAA Regulations and Legal Requirements for Drone Aerial Photography
Any drone operation performed for commercial purposes in the U.S. — filming for marketing, real estate listings, corporate videos, or any client deliverable — requires the operator to hold an FAA Part 107 Remote Pilot Certificate. Recreational flight rules do not apply to commercial work. The FAA proposed $341,413 in civil penalties against 27 drone operators between October 2022 and June 2024, with fines reaching $75,000 per violation under the 2024 FAA Reauthorization Act.
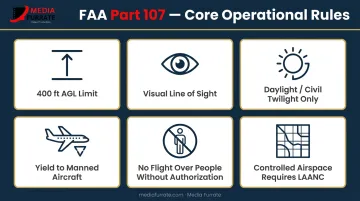
Core Part 107 operational rules:
- Maximum altitude: 400 feet AGL (above ground level), or higher within a 400-foot radius of a structure with authorization
- Must remain within visual line of sight of the operator at all times
- Daylight operations or civil twilight with proper anti-collision lighting (visible for 3 statute miles)
- Operations over moving vehicles or people require specific categories/conditions
- Must yield to all manned aircraft
- Flights in Class B, C, D, and E controlled airspace require authorization — LAANC is the primary path for routine authorizations
Getting certified means passing the UAG knowledge test at an FAA-approved testing center:
- 60 questions covering airspace, weather, regulations, and safety
- 70% passing score required within a 2-hour window
- Recurrent online training required every 24 calendar months
Media Furrate's founder Jason Furrate holds FAA Part 107 certification, so every aerial shoot is conducted in compliance with federal regulations. For clients, this matters practically: hiring an uncertified operator for commercial work exposes both the operator and the client to significant federal liability.
When Drone Aerial Photography Makes Sense for Your Business
Drone footage isn't the right answer for every production. It delivers maximum value when a ground-level camera physically cannot capture the full scope of the subject.
Strongest use cases:
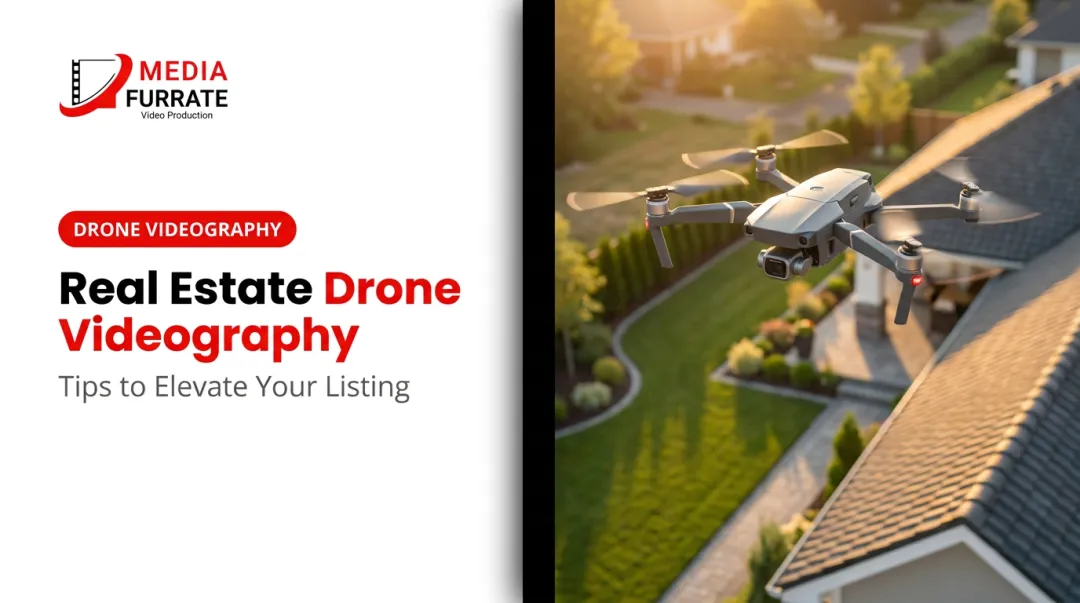
- Real estate and property listings — NAR reports 52% of REALTORS now use drone photography or video, making aerial coverage a standard expectation for showcasing acreage, building footprints, and neighborhood context
- Industrial and energy facilities — Pipeline corridors, large-footprint sites, and compliance documentation that requires a birds-eye view to capture accurately
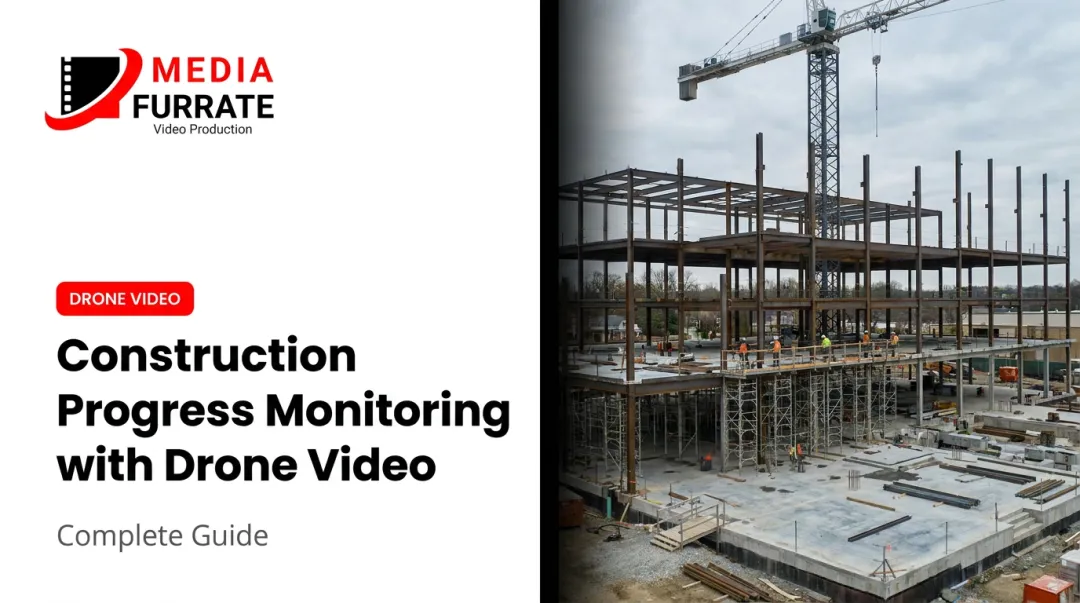
- Construction progress tracking — Sequential aerial shots document the full site layout, earthwork phases, and structural progress in a way no ground camera can replicate
- Brand campaigns and outdoor events — Aerial footage communicates scale and environment in ways ground-level cameras simply can't, making it effective for commercial advertising and large event coverage
- Healthcare and institutional communications — Campus tours and facility overviews for recruitment materials, donor appeals, or patient-facing content
That said, aerial footage isn't always the right call. There are situations where the added cost and logistics don't translate into better results.
When aerial footage doesn't add value:
- Highly urban environments with restricted airspace (requires LAANC authorization or waivers)
- Projects where the subject is entirely interior
- Situations requiring tight close-up detail that a ground camera handles better
- Projects where the production cost of a drone shoot outweighs the incremental visual benefit
Common Mistakes in Drone Aerial Photography
Skipping Pre-Flight Location Scouting
Arriving at a location without confirming airspace clearance, mapping obstacles, and identifying a safe launch area often results in aborted shoots and wasted travel. Before any commercial shoot, run your location through:
- B4UFLY — lists FAA-approved providers including Airspace Link, Aloft, AutoPylot, Avision, and UASidekick
- LAANC — required for controlled-airspace authorization
- A physical obstacle scan to confirm a safe launch and landing zone
Build this check into your pre-production timeline, not your morning-of routine.
Wrong Camera Settings for the Conditions
Leaving the drone in full auto mode causes white balance drift and exposure fluctuations during recording — problems that are visible in the delivered footage and can't be fixed in post. Shooting JPEG-only removes the ability to correct color, exposure, or lens distortion afterward. Both are permanent mistakes. The camera settings section above covers the correct configuration. Apply it on the ground before launch — never in the air.
Underestimating Wind, Weather, and Battery Constraints
Moderate wind at altitude (often significantly stronger than ground-level conditions) degrades gimbal performance and shot stability, even on drones rated for higher wind resistance. DJI's maximum flight-time specs are measured under windless, controlled conditions — real-world flight time with active maneuvering and camera operation is always shorter.

On time-sensitive productions like events or construction documentation, running out of battery before the key shots are captured isn't recoverable. Bring backup batteries and build weather contingency into every shoot plan.
Frequently Asked Questions
How much does aerial photography with drones cost?
Professional commercial drone shoots vary widely based on operator certification, equipment quality, project duration, and post-production scope. Factors like LAANC authorization fees, crew size, shoot days, and whether edited deliverables are included all affect the final price. Contact Media Furrate at (225) 317-4233 for a project-specific quote.
What is the 400-foot rule for drone aerial photography?
FAA Part 107 limits small UAS to 400 feet above ground level during flight. This ceiling can be extended when operating within a 400-foot radius of a structure with FAA authorization. The rule exists to keep drones safely separated from manned aircraft in controlled airspace.
Do you need a license to fly a drone for aerial photography commercially?
Yes. Any drone operation performed for compensation or business purposes in the U.S. requires an FAA Part 107 Remote Pilot Certificate, obtained by passing the Part 107 knowledge test at an FAA-approved testing center. Operating commercially without this certification is a federal violation with fines up to $75,000 per incident.
What industries benefit most from drone aerial photography?
The strongest use cases span several industries:
- Real estate — property scale, context, and curb appeal
- Construction — site progress documentation over time
- Industrial/energy — facility overviews and pipeline corridors
- Healthcare — campus and facility showcases
- Marketing/events — visual storytelling at scale
What weather conditions are best for drone aerial photography?
Clear to partly cloudy skies, wind speeds below 15 mph at flight altitude, good visibility, and shooting during golden hour produce the best results. Overcast conditions work well for architectural subjects by reducing harsh shadows. Avoid strong winds, rain, and heavy cloud cover.
What is the difference between oblique and vertical (nadir) aerial photography?
Oblique shots are taken at an angle and show a subject's facade, surroundings, and spatial context — standard for real estate, marketing, and events. Nadir shots are taken straight down and are better suited for mapping, site surveys, property footprint documentation, and revealing ground-level patterns invisible from any oblique angle.